Practice on developing a full-fledged shortcode – lesson 31
For an example of developing a shortcode and fixing the material covered on WordPress, we will take a collection of effects for links Creative Link Effects and develop our own shortcode for it in the future premium theme.
The work of the style collection is to, to include styles and arrange classes, where needed. Here is an example of a customized structure for one effect:

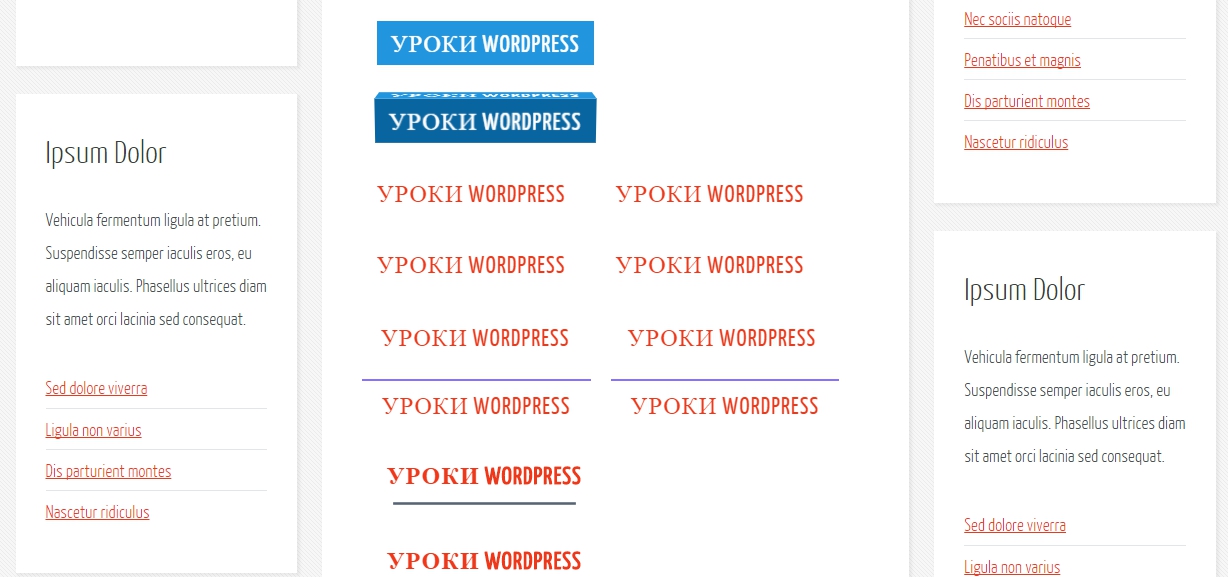
In general, the set offers 21 website link style. A demonstration of how different link styles work can be see here.
Embedding Styles in WordPress and Adding a Shortcode
To get started, download the ready-made collection style file from my the site.
In my archive, there are already slightly prepared styles for our template.
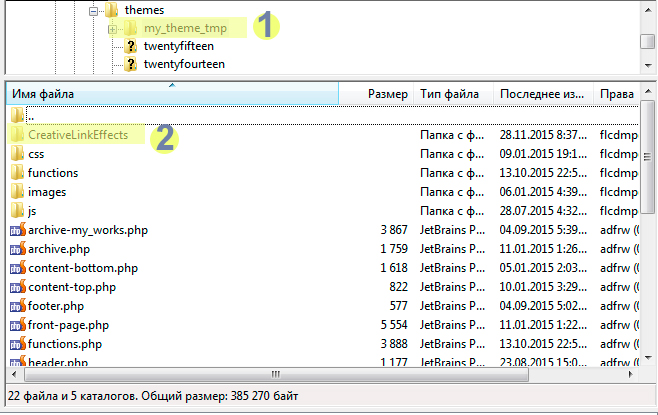
Go to the downloaded archive and transfer the folder creative-link-effects at the root of our topic.
Next, we need to connect the style file to our theme., to do this, go to the file /wp-content/themes/my_theme_tmp/functions/custom-header-script.php and add connection code.

So that the code can be copied to my file, I posted an additional fragment.
wp_register_style('link-effect', $tmpDir.' /creative-link-effects/css/component.css');
wp_enqueue_style('link-effect');
After connecting the style file, we need to create a new shortcode in the file created in the previous lessons:
wp-content/themes/my_theme_tmp/functions/shortcode/shortcode.php
Since the lesson is to consolidate knowledge, I think it would be right to lay out the finished code and tell how to use it.
![]()
Consider the shortcode itself and the code snippet:
[link_effect effect="1" links="https://wp-admin.com.ua, https://wp-admin.com.ua" anchors="WordPress1 Tutorials, WordPress2 Tutorials" target="blank"]
In the shortcode, you can specify which effect you are interested in effect=”1″ and specify links and texts for links (anchors) separated by commas. I pay attention to, that the number of links and their anchors should be the same. You can also specify an attribute target=”blank” if you want the link to open in a new window.
Consider the code of the shortcode itself:
function creative_link_effect_func( $atts ) {
    $effect = $atts['effect'];
    if($effect==''){ return 'Select effect, from 1 up to 21'; }
    $links = $atts['links'];
    $target = $atts['target'];
    $subtitle = $atts['subtitle'];

    if($target=='' or !isset($target)){ $target == '_self'; }
    if($links==''){ return 'Вы должны указать минимум 1 ссылку которую будите использовать'; }
    $anchor = $atts['anchors'];
    if($anchor==''){ return 'Вы должны указать минимум 1 содержимое ссылки'; }

    $links = explode(',',$links);
    $anchor = explode(',',$anchor);
    $subtitle = explode(',',$subtitle);
    if(count($links)!= count($anchor)){ return 'Количество анкоров и ссылок несовпадает'; }
At the beginning, we define all attributes as variables and form arrays from some. In this part, we also do various checks to exclude situations when the user did not enter the required parameters or indicated the wrong number of them.. Exceptions will display an error message instead of links. If you have already developed php, then it will not be difficult for you to read this code.
Choosing a shortcode effect and generating an output template
   if($effect>0 && $effect<22 ) {
        switch ($effect) {
            case 1:
                $res = '<nav class="cl-effect-1" id="cl-effect-1">';
                if(is_array($links)){
                    foreach($links as $k => $v){
                        $res .= '<a href="'.$links[$k].'" target="'.$target.'">'.$anchor[$k].'</a>';
                    }
                }
                $res .= '</nav>';
                return $res;
                break;
            case 2:
                $res = '<nav class="cl-effect-2" id="cl-effect-2">';
                if(is_array($links)){
                    foreach($links as $k => $v){
                        $res .= '<a href="'.$links[$k].'" target="'.$target.'"><span data-hover="'.$anchor[$k].'">'.$anchor[$k].'</span></a>';
                    }
                }
                $res .= '</nav>';
                return $res;
                break;

---------
Next, we check if the effect number is correct., which should be from 1 before 21 “ if($effect>0 && $effect<22 ) { “. After checking with the conditional construction “switch case” we make the program check the variable $effect and select the desired block of code. The construct finds the desired block of code for the specified effect and executes it.
In a block of executable code:
case 1:
                $res = '<nav class="cl-effect-1" id="cl-effect-1">';
                if(is_array($links)){
                    foreach($links as $k => $v){
                        $res .= '<a href="'.$links[$k].'" target="'.$target.'">'.$anchor[$k].'</a>';
                    }
                }
                $res .= '</nav>';
                return $res;
                break;
into a variable $res we put a piece of code <nav class=”cl-effect-1″ id=”cl-effect-1″> -> check if the variable is $links mass -> using a cycle foreach iterate through all the elements of the array and dock (concatenation .=) them into a variable $res -> close the tag </nav> -> return a variable with return $res, all the contents of the variable will be displayed on the site page. The same can be done for other effects., note the pattern structure of different effects is different, so be careful.
Here's how it turned out to display different shortcodes on my test site:
If you didn't succeed, then I would advise you to just copy my code from the file shortcode.php and trace line by line what happens there. You can also read the previous lesson “Creating shortcodes - lesson 30“. Good luck developing the right website templates, according to the rules of the WordPress API.
The code of the entire developed template at this stage of training
![]()

/*

- Basic web design course;
- Site layout;
- General course on CMS WordPress and continuation of the course on template development;
- Website development in PHP.