The first step in learning WordPress – Lesson 1
As usual, learning a content management system begins with its installation.. My CMS is WordPress. There are two installation options, can download Russian version or English version. Since the localization (wordpress translation) very well done, you can safely use the Russian version of WordPress.
You can install CMS on the local computer using Denver or hosting. Hosting I would advise inexpensive, but very good ukraine.com.ua.
Since many students do not understand, how to work on hosting, then I will tell you on the example of hosting ukraine. We go to hosting and register. If you bought hosting with a domain, then you can immediately install there, I will start installing on a subdomain, since the main domains are already taken by me. So after registering on the hosting and going into it, we get to the admin panel.

I divided the important points for getting started into numbers, Let's start studying them..
Under the number 2 we can choose for which country we will make a website, this is an important point, if you want to properly promote the site in the future and not incur extra costs. When optimizing a website, there are no unimportant details, and at the moment the hosting supports addresses for Germany, USA, Russia and Ukraine.
Under the number 1 you can register a domain on the image:
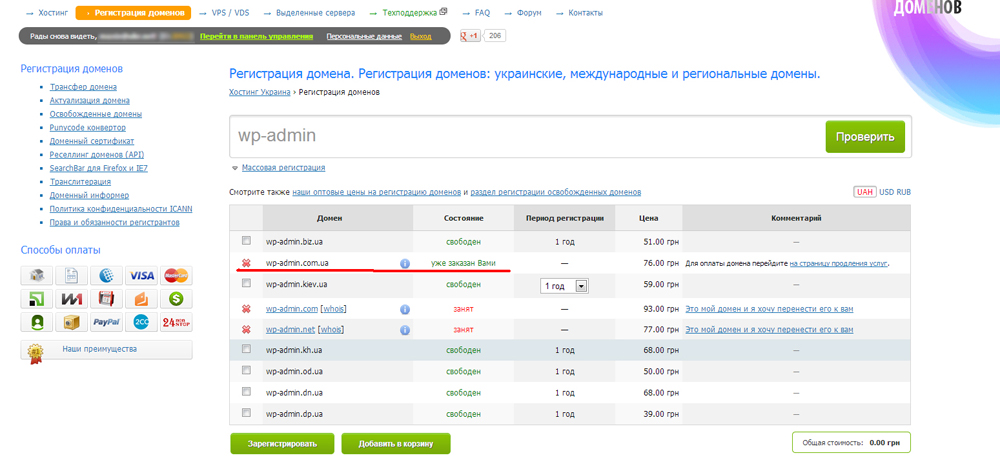
Enter the domain name, select a free domain from the list and click register.
The next step will take you to the user agreement window., with which you must agree to register a domain name for your future site. I recommend reading the agreements during registration, sometimes interesting things are written there.
Attention important fact. To register domain names in the zone ru, do … and other official domains, who represent the country, you must specify the registration number of the legal entity or a certificate of registration of the trademark. You can find out more about this from technical support., e.g. online chat or phone call. If you are registered, then the hosting has an internal communication system with hosting administrators.
I won't show you any more., since I don't need to buy a domain yet, but for further learning I need to register a subdomain. So I follow the link https://cp.ukraine.com.ua/hosting -> go to point number 3 “My sites“. In the window that opens, select Add subdomain.
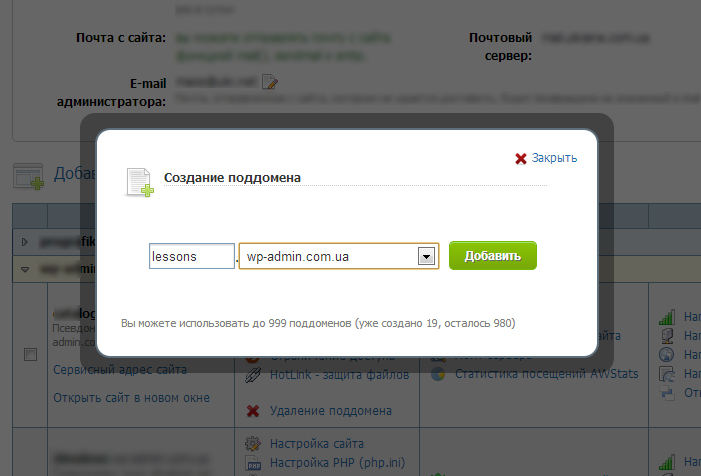
After adding a subdomain, the hosting will show you a message about the need to wait a few minutes 15 while the subdomain is set up for you.
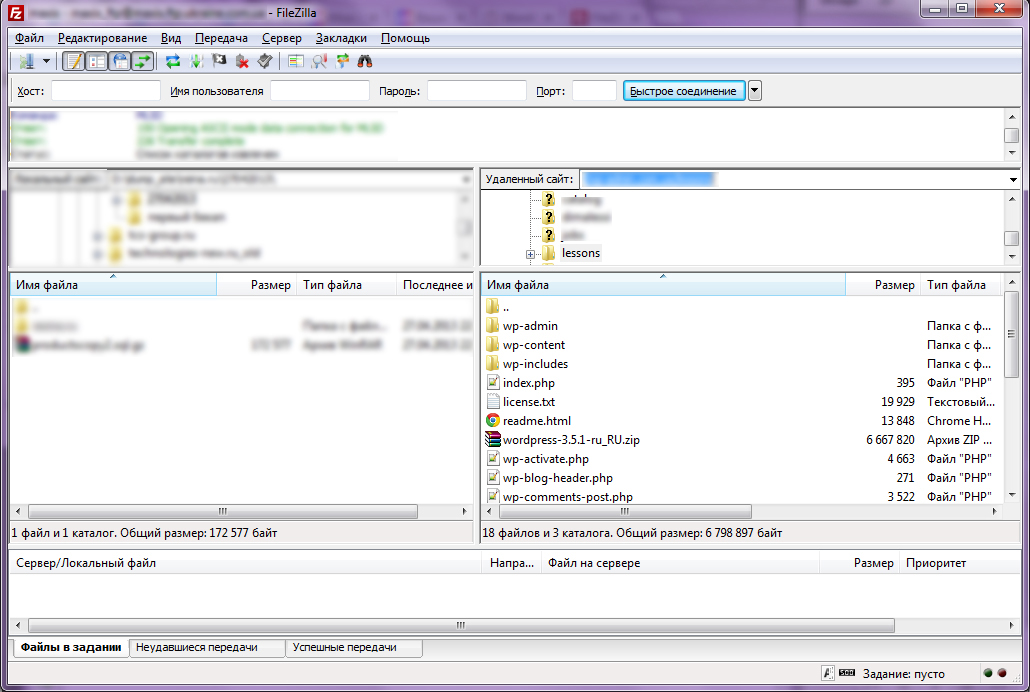
After setting up the domain, you need to go to point 4 and create a user FTP for file management. To work with FTP you can use the program filezilla. If you created the user correctly FTP, you will be able to see the index.html file (stub on site). This download can be removed if necessary and upload files in its place WordPress. The uploaded CMS files should look like this:
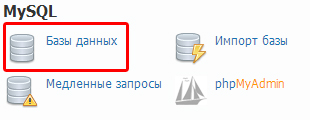
If the files are filled, you need to create a database and a user to access the data of the created database. Follow the https link://cp.ukraine.com.ua/hosting/ and click on the item Database.
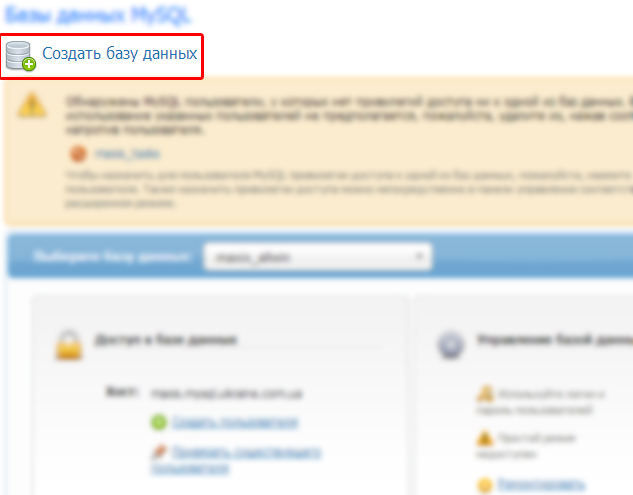
In the window that appears, select Create database
The next step will be a pop-up window., specify the name of the database in it, Leave the rest of the settings as is., how hosting offers us.
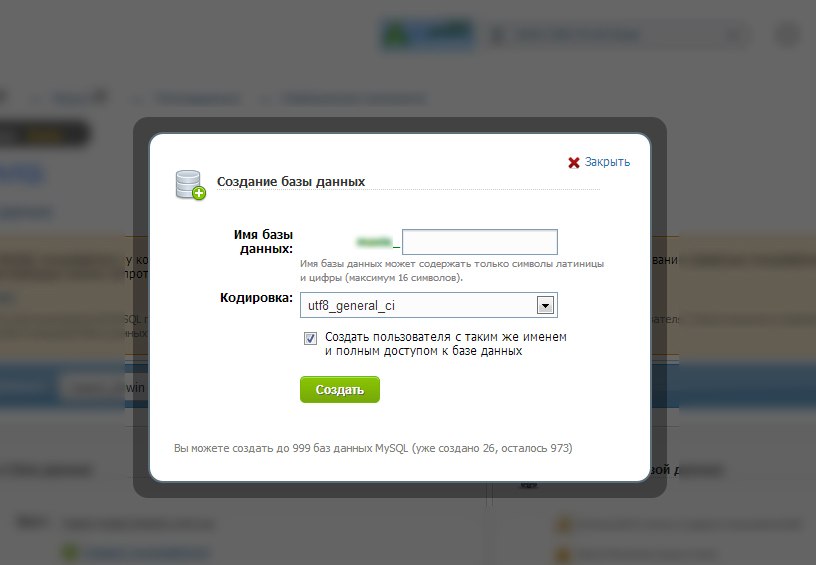
If you did not uncheck the box when creating the database, then along with the database you will have a user with the same name as the name of the database and full access to it.
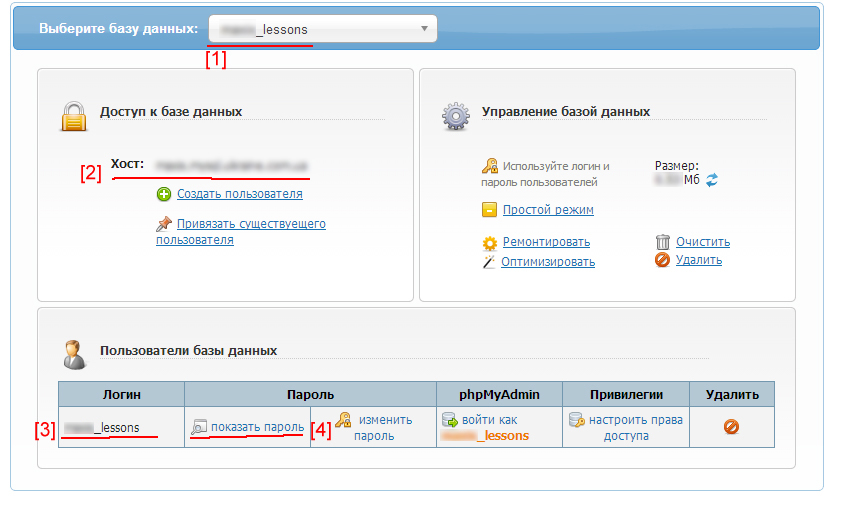
After creating the database and user, you need to record important data for yourself, namely database name, host, login, and password, see image below.
With the database, everything turned out to be very voluminous, but it was worth it. So, base created, data recorded, proceed to the installation of the engine.
Let's go to the site, my address is lessons.wp-admin.com.ua. After the transition, you will see a message.
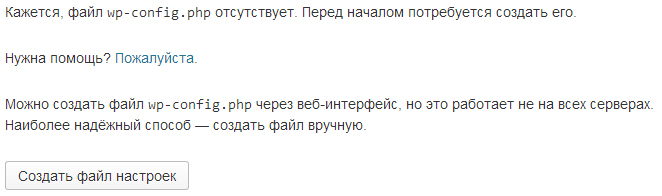
Click on the button Create settings file. The second step of creating the settings file as follows, the picture is clear, that the system developers have already taken care of, to inform you, how to act. Look at the image of the second setup step below..
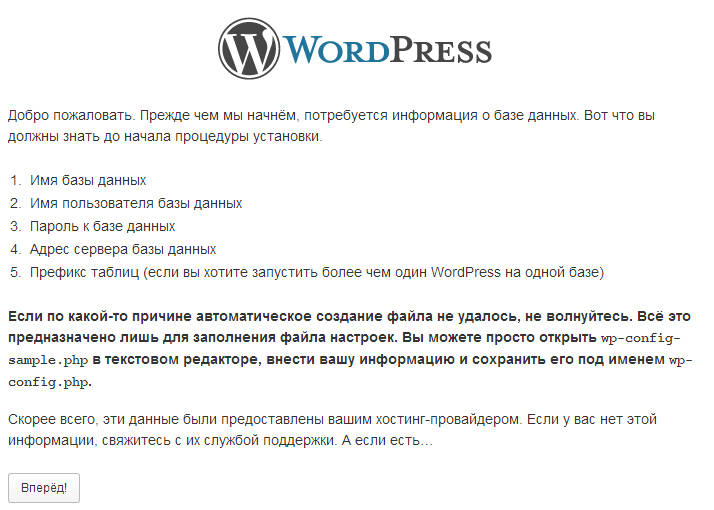
After pressing the button Forward you get to third step of installing WordPress, where you need to specify the parameters for connecting to the database.
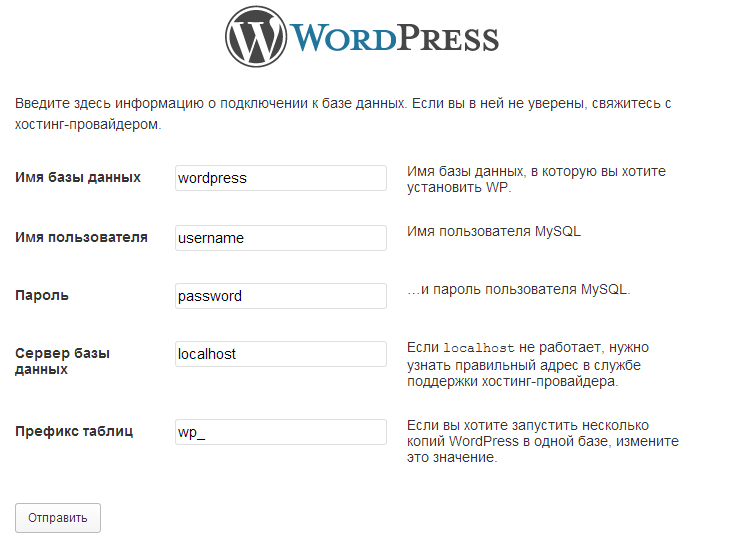
Filling the form with the data of the created database. The last input field in the form is Table prefix it needs to be unique, default WordPress suggests a prefix wp_ but you can change it. We press the button Send.
The next step gives us the opportunity to configure the basic settings for the site, his name, login, password, admin email and indexing option.
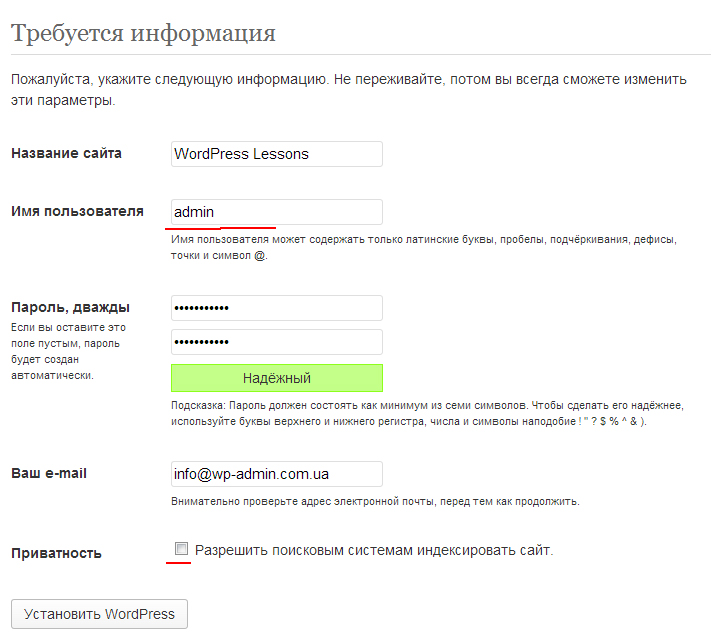
I have underlined the important points in the image., which should never be neglected. Follow all the clues in the image, they were not just written, they are really important. The login of the main administrator must be unique, it is advisable not to leave it as a standard admin, better make up your own. I also underlined the checkbox “Allow search engines to index your site“, this checkbox must be unchecked, so that search engines do not find the site until it is ready for viewing by users. The ban on indexing is due to the fact that WordPress itself can ping search engines and thereby give a signal to search engines that it's time to start indexing the site.. If the checkbox is unchecked, then there will simply be no such signal to the search engines, until then we give permission in the site settings for indexing. Moreover, if search engines find your site for some reason, then this setting will prevent search robots from walking around the site and displaying results in the search. Simply put, search engines will crawl your site, until you let them.
This is the end of the WordPress installation., after it you will see an invitation to enter the admin panel. Let's get in:
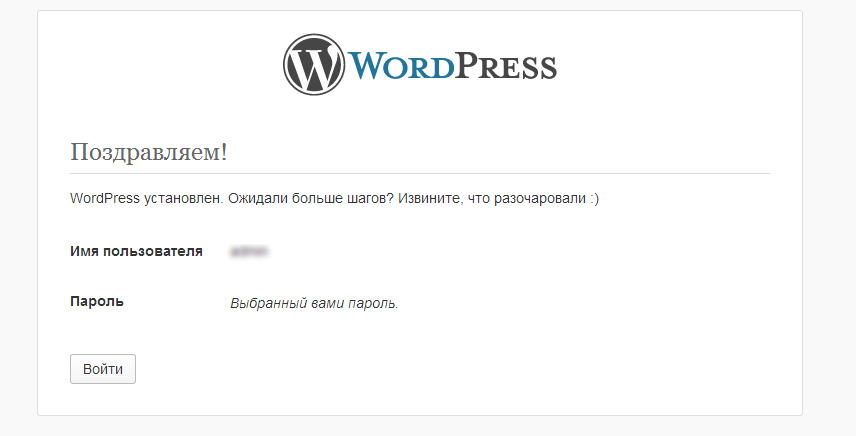
After clicking on the Login button, you will be taken to the page site-name.com/wp-login.php, Where can I enter my password and username?. If you are logged in, it means that the site is already working and you can proceed to setting up WordPress. That's all for now, expect the next tutorial for beginner developers, good luck with learning and development.


- Basic web design course;
- Site layout;
- General course on CMS WordPress and continuation of the course on template development;
- Website development in PHP.