Setting up a multi-level menu on the site – lesson 22
First you need to create pages, which will give us a plan of action and development for the future course. I would like to create a premium template with you and show, that it is not so difficult and quite possible to do. The bonus will be, the fact that at the end of the course you will receive a complete guide to action for developing premium templates and their sale on the stock exchanges, so keep watching for new posts.
Create website pages:
- home
- blog
- about
- Contact
- Shortcodes
- Error 404
- page 1 column
- page 2 column
- page 3 column
- portfolio
- Single standard
- Single gallery
- Single video
- Single audio
- Single portfolio
- Single product
- Shop
- Single prodect
After creating the pages, go to the item Appearance -> Menus and delete old items. After deleting, do not forget to press the Save Menu button.

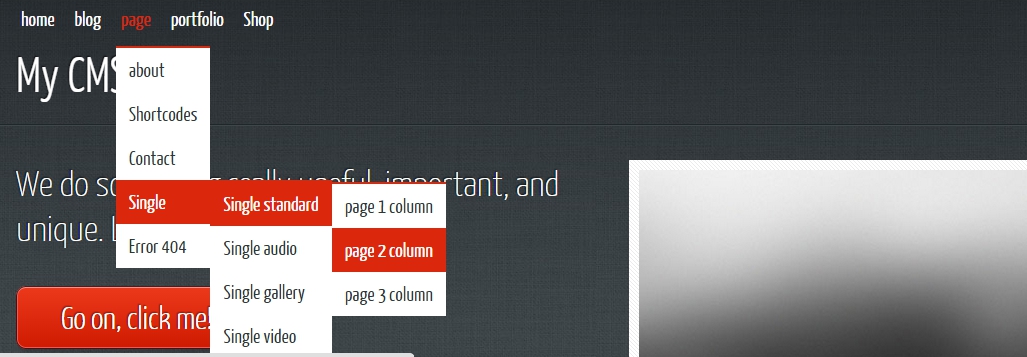
Add to the top menu of the page as shown in the picture below.
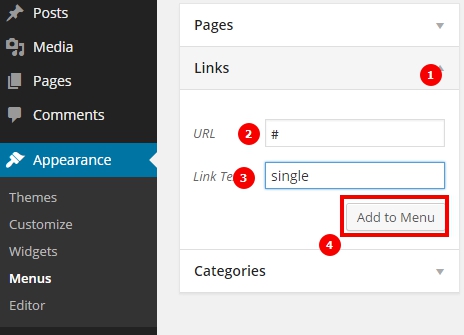
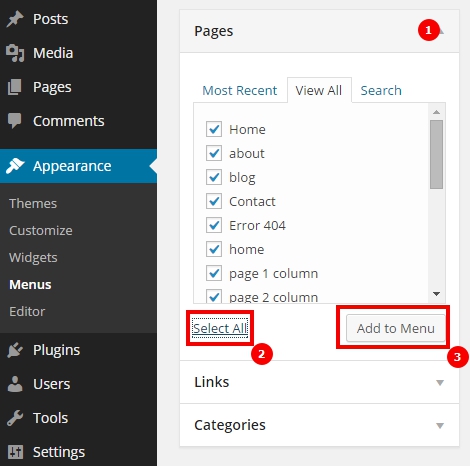 If extra pages were added, then you can simply remove them from the lists of items. When you make a menu, you can use stubs, they are not hard to make, just add a dash instead of a link (#).
Let's form the menu structure, dragging items to the right place.
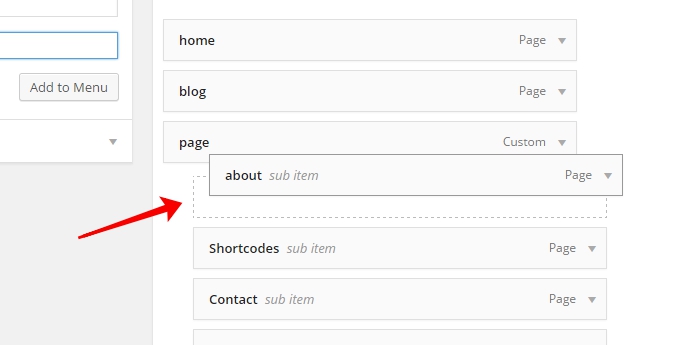
We form a structure with attachments, as below:
- home
- blog
- page ( # )
- about
- Shortcodes
- Contact
- single ( # )
- Single standard
- page 1 column
- page 2 column
- page 3 column
- Single gallery
- Single video
- Single audio
- Single portfolio
- Single product
- Single standard
- Error 404
- portfolio
- Single prodect
- Shop
After the formation of the menu on the site, everything crawled, since the template did not contain a drop-down multi-level menu.
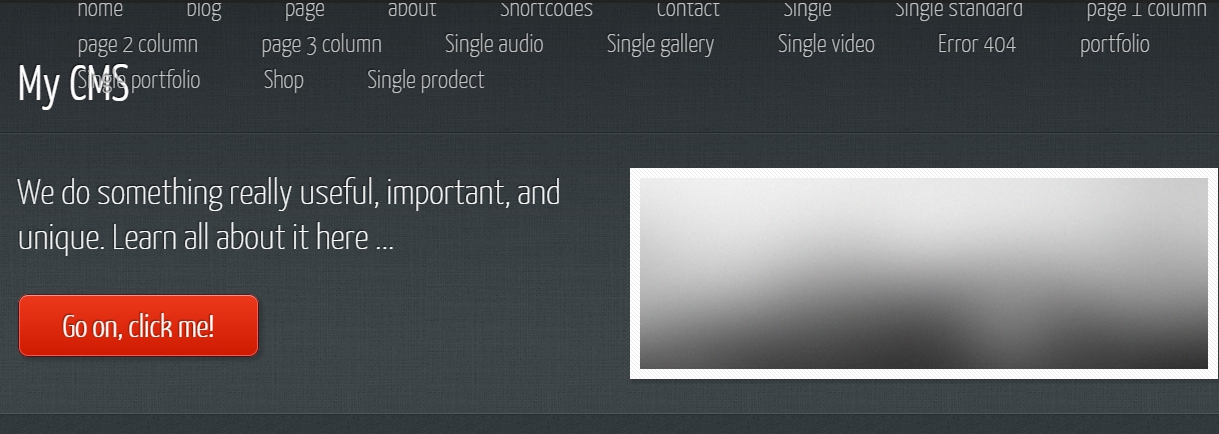
I think, it will be correct to clean up the template and set up a new menu.
Remove extra javascript in header.php file, so that he does not bother us, remnants of the old menu:
<script src="<?php echo bloginfo('template_url'); ?>/js/init.js"></script>In header.php, let's include styles for the new menu. Our menu will work exclusively on css.
<link rel="stylesheet" href="<?php echo bloginfo('template_url'); ?>/css/menu.css" />To file menu.css, adding styles for the future menu, I give you a sample:

In the header.php file, replace our old menu with the new one:
							<!-- Start responcive-menu.com BODY -->
							<?php
 								$args = array(
									'theme_location' => 'header-menu',
									'menu_class' => 'topmenu',
									'menu_id' => 'responcive-menu1',
									'items_wrap' => '<input type="checkbox" id="responcive-menu-switcher" class="resp-menu-switch-input"><ul id="%1$s" class="%2$s"><li class="switch"><label onclick="" for="responcive-menu-switcher"></label></li>%3$s</ul>'
								);
								wp_nav_menu($args);
							?>
							<!-- End responcive-menu.com BODY -->
Let's also move the logo under the menu in the code. Think, it’s not worth telling a lot, it would be more correct to give you an independent task of analyzing and transferring new code from the header.php file. After the transfer, your menu should look like this:
Template sources:
![]()
Additional refinement
After creating the pages, let's specify the main page in the settings (Settings -> Readings -> On the main page display -> Static page -> Home) and a blog page (Settings -> Readings -> Posts page -> Blog), it will display all our publications.

At the moment, we still need to finalize the template for the main page and for the blog, so that the posts are displayed properly. We will talk about these two pages and the development of page templates in general in the following lessons..


- Basic web design course;
- Site layout;
- General course on CMS WordPress and continuation of the course on template development;
- Website development in PHP.