Adding a Thumbnail to a WordPress Post – lesson 16
On many sites, the material is divided into categories and when we enter them, then we see not only the title and text, but also the post thumbnail (in English thumbnail). My website is an example.:

The name miniature has historically remained behind such an image., although many pictures can be not only small, but also stretch to the full width of the page.
For works with thumbnails, they must first be included in the CMS. In order to enable thumbnails in WordPress, you need to add a special code to the functions.php file.
We don't have a functions.php file yet, it is used to write php functions and run built-in functionality in CMS. Let's create a functions.php file in our theme my_theme_tmp.

In the functions.php file type the code:
<?php
if ( function_exists( 'add_theme_support' ) ) {
	add_theme_support( 'post-thumbnails' );
}
?>
This code will enable thumbnail support in CMS, without it, you simply won’t be able to add a thumbnail in the control panel. After adding the code to the functions.php file, go to the admin panel and start creating a new post, on the right you have a metabox “Thumbnail records” (Featured Image).
WordPress has a standard thumbnail size, which can be changed if necessary., adding special code:
add_theme_support( ‘post-thumbnails’ );
The full code of the functions.php file will look like this:
if ( function_exists( 'add_theme_support' ) ) {
	add_theme_support( 'post-thumbnails' );
	set_post_thumbnail_size( 200, 200, true );
}
After all the settings are done, you can proceed to work with the thumbnail output in the archive.php file loop.
Output thumbnails of WordPress posts
To display the picture of the entry, you must insert a special code next to the text of the entry in the archive.php template.
										<div class="thumb">
											<a href="<?php the_permalink(); ?>" class="image image-full">
												<?php if ( has_post_thumbnail() ) {
												the_post_thumbnail();
												 }  ?>
											</a>
										</div>
The picture shows the place, where to put the code:
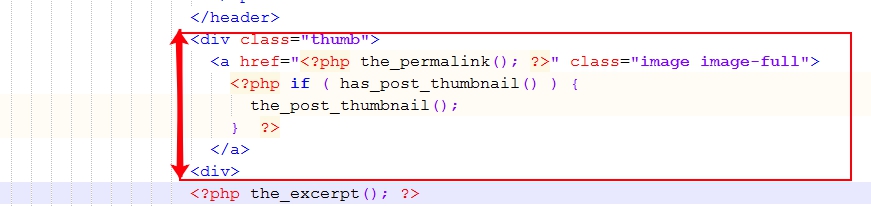
I added the thumb class to the code, we will need it, to align the thumbnail to the left of the text, and not over him.
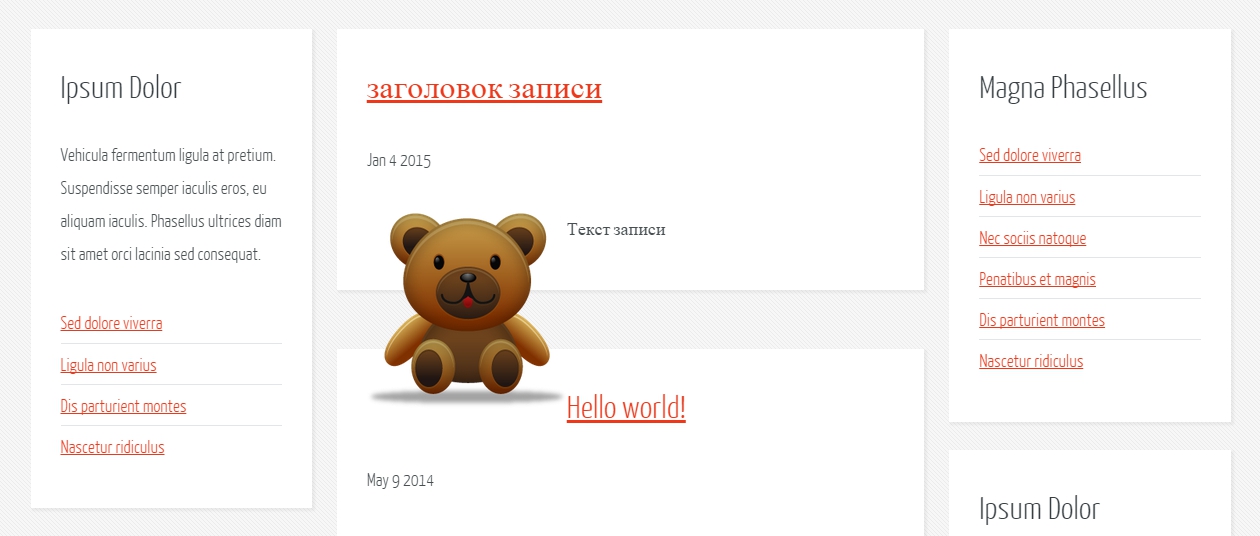
Go to /wp-content/themes/my_theme_tmp/css/style.css and add style:
section.is-post .thumb{
width: 200px;
height: 200px;
float: left;
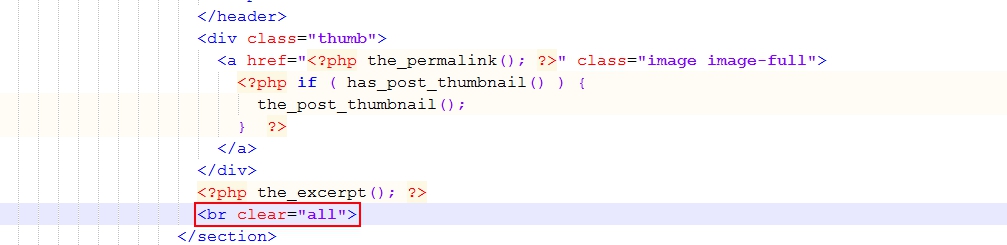
}After adding styles, the text under the thumbnail is in place, but the records began to run into each other, it happens because of float alignment.
In order for everything to fall into place, we can add an alignment cleanup in the right place.. The easiest way is through the tag <br clear=”all” />.
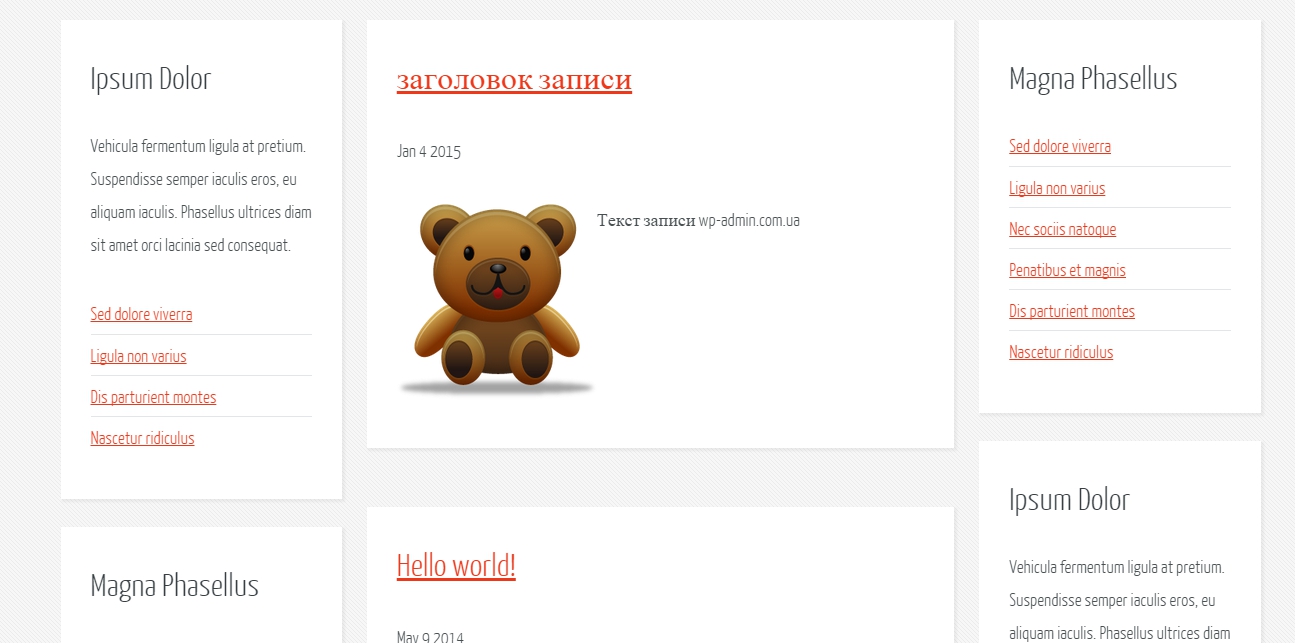
After finishing the code, you should have something like this:
Functions used in this tutorial:
the_permalink() - link to full post. While we do not work, because you need to modify the template.
if ( has_post_thumbnail() ) { – construction checks if the entry has a thumbnail. Function has_post_thumbnail() checks for the presence of a thumbnail and returns true if there is a thumbnail.
the_post_thumbnail() - displays a thumbnail for the record of the standard size or the size that we specified in the functions.php file ( set_post_thumbnail_size( 200, 200, true ) ).
function_exists( ‘add_theme_support’ ) - checks if the function in the code above was launched in this case, the add_theme_support function.
add_theme_support( ‘post-thumbnails’ ) – adds the ability to work in thumbnails to the theme.
set_post_thumbnail_size( 200, 200, true ) - specifies the thumbnail size for the entry.
That's all. Download my sources, understand my code and do the same for yourself.
![]()
In the next lesson, we'll talk about outputting one complete record., consider, how to create a custom post template.

/*

- Basic web design course;
- Site layout;
- General course on CMS WordPress and continuation of the course on template development;
- Website development in PHP.