Output of portfolio works in the form of a grid with a filter - lesson 27
Data is added and output, but I would like not just to display data, but to make something similar to a real portfolio, with a list of works that can be viewed and filtered. Right now, our portfolio looks like regular posts. You can see the work of the portfolio we created earlier by clicking on the link https://{your site}/my-portfolio/
How to display portfolio now

How will the portfolio be displayed after completion
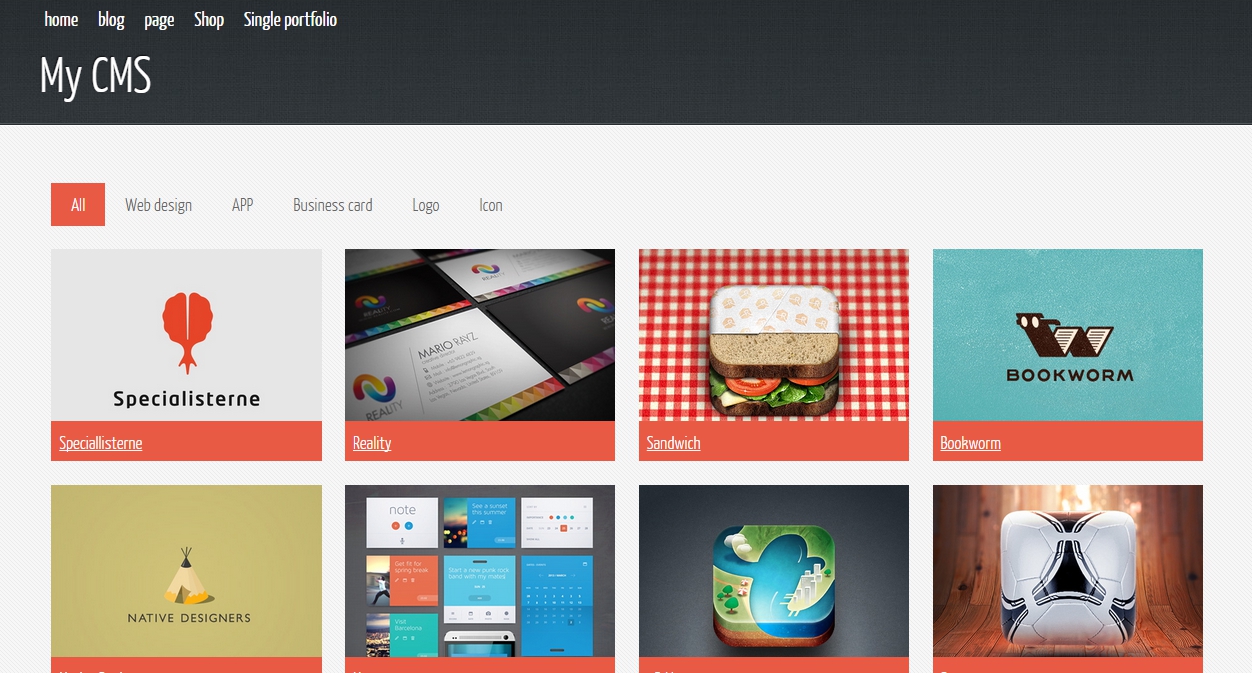
Gallery demo on the developer's site
We continue to work on our theme
I think you, like me, don't like it very much, that the link looks like /my-portfolio/, let's change this in the file /wp-content/themes/my_theme_tmp/functions/custom-type.php.
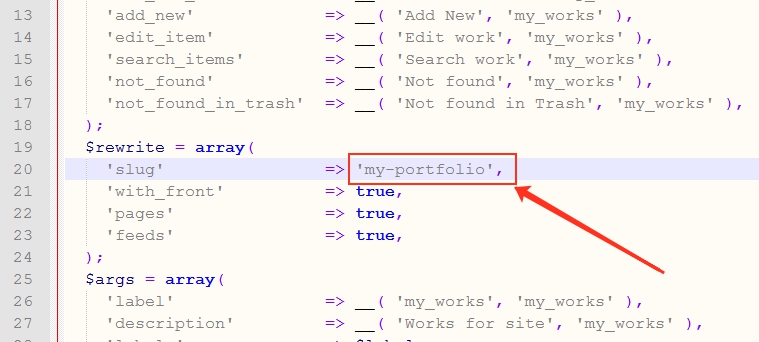
Let's change slug such my-portfolio on portfolio. If you follow your link https://{your site}/portfolio/, you may run into a problem, since we have already created a page with a label (slug) portfolio. In order for our records to be displayed well again, Let's delete the page labeled portfolio.
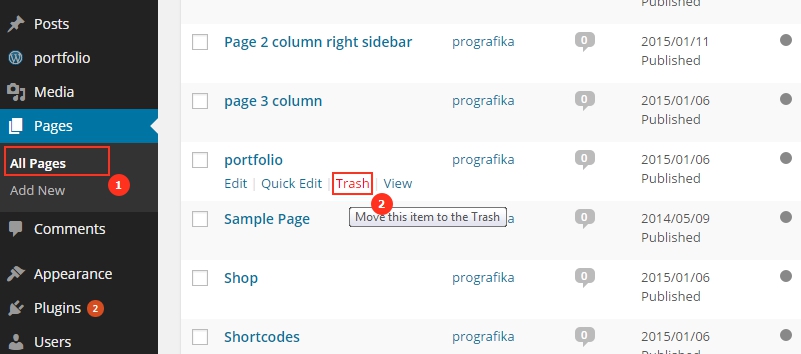
After deleting a page, wordpress still remembers it. To permanently close the issue with the portfolio label, we need to remove this page from the basket.
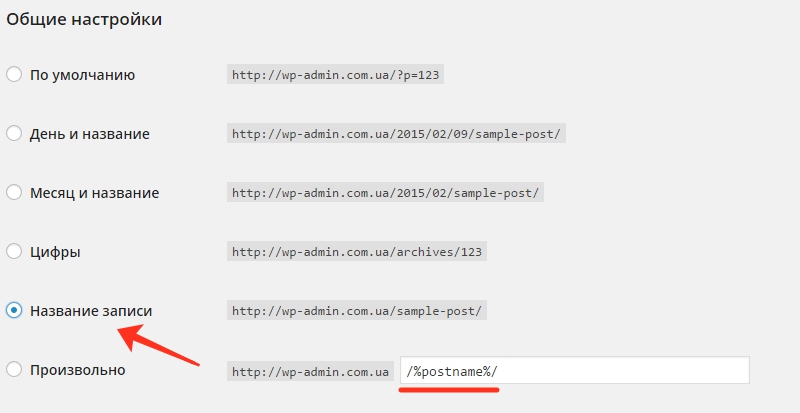
 After these actions, the template of a separate page is no longer displayed for me, but i found a way. If you have the same error, then you need in the settings in the section “Permalinks” first switch to default view (Default), so that all links work in the form https://wp-admin.com.ua/?p=123, save the setting.

After saving again in the link settings, select “Title records“, as shown below and save.
After these not tricky manipulations, links and a new label of an arbitrary type should work normally again. /portfolio/.
Customizing the output template
After setting up beautiful links, let's move on to setting up a template for displaying all works in the portfolio. We'll call the template archive-my_works.php (archive-{post type}.php). Since our type was called my_work, then the creation of a file with this name will be automatically assigned to the list of records of this type.
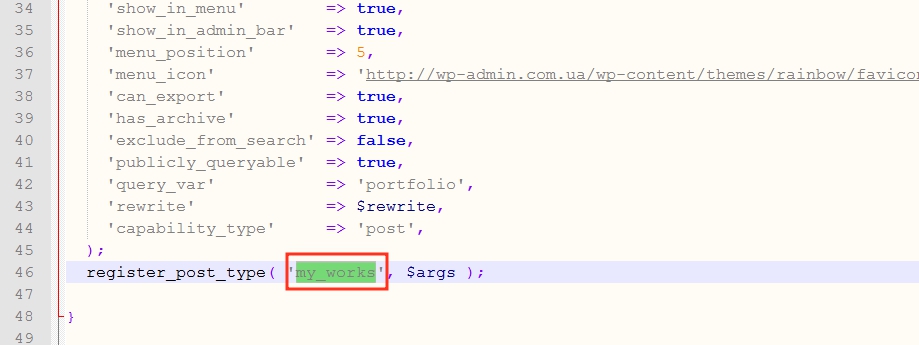
The name of our type can be seen in the file /wp-content/themes/my_theme_tmp/functions/custom-type.php, in the picture below i will show where to look.
 Let's place the base code of the top, central and lower.
|
1 2 3 4 5 6 7 8 9 10 11 12 13 14 15 16 |
<?php get_header(); ?> <div id="header-wrapper"> <?php get_template_part( 'content-top', get_post_format() ); ?> </div> <!-- Content --> <div id="content-wrapper"> <div id="content"> <div class="container"> <div class="row"> <!-- тут будет вывод портфолио --> </div> </div> </div> </div> <?php get_template_part( 'content-bottom', get_post_format() ); get_footer(); ?> |
Since the portfolio will use new scripts, then we will need to connect them. Scripts need to be connected like this, so that they are displayed between the tags <head></head>, but did not change the main template code header.php.
To connect scripts create a file /functions/ create file custom-header-script.php and plug it in functions.php our theme.
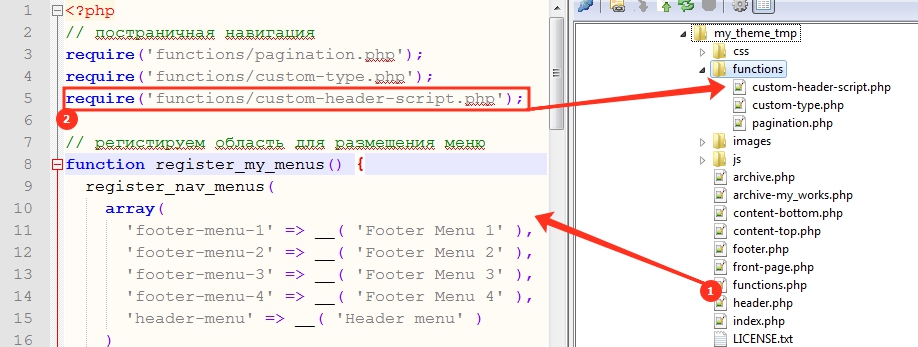
To file custom-header-script.php enter the code to connect the gallery script.
|
1 2 3 4 5 6 7 8 9 10 11 12 13 14 15 16 17 18 19 20 21 22 23 24 25 26 27 28 29 30 31 32 33 34 35 36 37 38 39 40 41 |
<?php function my_scripts_method() { $tmpDir = get_template_directory_uri(); if ( uGetPostType() == 'portfolio'){ wp_register_script( 'easing-portfolio', $tmpDir.'/js/simple-portfolio-page/js/jquery.easing.min.js'); wp_enqueue_script( 'easing-portfolio' ); wp_register_script( 'mixitup-portfolio', $tmpDir.'/js/simple-portfolio-page/js/jquery.mixitup.min.js'); wp_enqueue_script( 'mixitup-portfolio' ); wp_register_script( 'custom-portfolio', $tmpDir.'/js/simple-portfolio-page/js/custom.js'); wp_enqueue_script( 'custom-portfolio' ); } } add_action( 'wp_enqueue_scripts', 'my_scripts_method' ); function add_my_stylesheet() { $tmpDir = get_template_directory_uri(); if ( uGetPostType() == 'portfolio'){ wp_register_style('normalize-portfolio', $tmpDir.'/js/simple-portfolio-page/css/normalize.css'); wp_enqueue_style('normalize-portfolio'); wp_register_style('layout-portfolio', $tmpDir.'/js/simple-portfolio-page/css/layout.css'); wp_enqueue_style('layout-portfolio'); } } add_action('wp_print_styles', 'add_my_stylesheet'); function uGetPostType(){ $post_type = get_post_type(); if ($post_type){ $post_type_data = get_post_type_object( $post_type ); $post_type_slug = $post_type_data->rewrite['slug']; return $post_type_slug; } } ?> |
The above script connects CSS and JS files in WordPress to that place, where in the file header.php installed function wp_head(). You can read more about the functions of connecting fonts on my article “Working with jquery in WordPress“, which, using the jquery library as an example, shows how to include scripts. You can also read about including styles in the WordPress codex..
My example has a custom function uGetPostType() created by me, it serves to pull out the current data type on the current page. Based on the received type, we determine whether we need to add scripts to the site header or not.
The next step is to add a gallery to your website files.. Download the gallery archive below and put it in a folder /wp-content/themes/my_theme_tmp/js/simple-portfolio-page/… .
![]()
I offer you my code for displaying this gallery in a file archive-my_works.php:
|
1 2 3 4 5 6 7 8 9 10 11 12 13 14 15 16 17 18 19 20 21 22 23 24 25 26 27 28 29 30 31 32 33 34 35 36 37 38 39 40 41 42 43 44 45 46 47 48 49 50 51 52 53 54 55 56 57 58 59 60 61 62 63 64 65 66 67 68 69 70 71 72 73 74 75 76 77 78 79 80 81 82 |
<?php get_header(); ?> <div id="header-wrapper"> <?php get_template_part( 'content-top', get_post_format() ); ?> </div> <!-- Content --> <div id="content-wrapper"> <div id="content"> <div class="container"> <div class="row"> <?php // берем все имеющиеся термы (категории нашего портфолио) из таксономии category_portfolio $categories = get_terms( 'category_portfolio', array( 'orderby' => 'count', // в начале показывает категории с большим количеством работ 'hide_empty' => 0, // скрывает пустые категории ) ); ?> <div class="container"> <ul id="filters" class="clearfix"> <?php /* формируем структуру меню фильтра для портфолио на основе полученных категорий */ foreach($categories as $cat){ if($cat->parent==0 && $cat->count>0){ $singleCat .= '<li><span class="filter" data-filter="'.$cat->slug.'">'.$cat->name.'</span></li>'; $allCat .= $cat->slug.' '; } } echo '<li><span class="filter active" data-filter="'.$allCat.'">All</span></li>'; echo $singleCat; /* формируем структуру меню фильтра для портфолио на основе полученных категорий */ ?> </ul> <div id="portfoliolist"> <?php // выводим работы из портфолио $args = array( 'post_type' => 'my_works' // указываем записи какого типа необходимо достать ); $query = new WP_Query; $portfolio_item = $query->query($args); // делаем запрос данных foreach( $portfolio_item as $item ){ $category = get_the_terms( $item->ID, 'category_portfolio' ); // достае все термы таксономии category_portfolio $flag = 0; foreach($category as $catItem){ if($flag == 0){ // если запись закреплена за одной категорией, категории сохраняются без запятой $dataCat = $catItem->slug; $dataCatComma = $catItem->name; }else{ // если запись закреплена за несколькими категориями, категории сохраняются с запятой $dataCat .= ' '.$catItem->slug; $dataCatComma .= ', '.$catItem->name; } $flag++; } $attachmentId = get_post_thumbnail_id($item->ID); $thymbUrl = wp_get_attachment_url($attachmentId, 'full', true); // берем URL миниатюры, которая относится к записи echo ' <div class="portfolio '.$dataCat.'" data-cat="'.$dataCat.'"> <div class="portfolio-wrapper"> <img src="'.$thymbUrl.'" alt="" /> <div class="label"> <div class="label-text"> <a class="text-title">'.$item->post_title.'</a> <span class="text-category">'.$dataCatComma.'</span> </div> <div class="label-bg"></div> </div> </div> </div> '; } ?> </div> </div><!-- container --> </div> </div> </div> </div> <?php get_template_part( 'content-bottom', get_post_format() ); get_footer(); ?> |
The code is quite large, but i added comments, to make it easier to understand. Below you can download the full code of the template at the moment.
![]()
The last thing left for us is to add a link to the portfolio in the menu of our site. We go to the menu Appearance -> Menu -> Links and add a new link /portfolio/, put the resulting link in the right place.
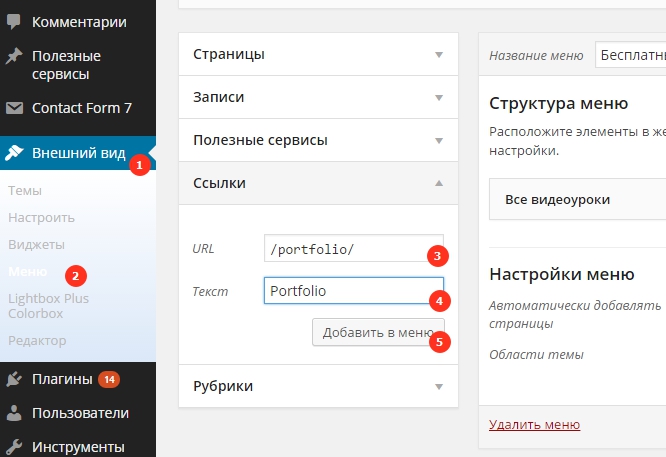
Move the menu item to the right place, so that when you enter the site it can be seen.
Portfolio template ready to go, try to understand the lesson, If it does not work out, then ask questions in the comments. I'll try to answer them as soon as possible.
In the next tutorial, we will implement the opening of each job in a pop-up window. (lightbox) for portfolio.


- Basic web design course;
- Site layout;
- General course on CMS WordPress and continuation of the course on template development;
- Website development in PHP.