Custom fields in categories and taxonomy
Previously, I already wrote in various lessons about custom fields, creating data types and taxonomy, also wrote about the wonderful paid set of plugins which can do this without interfering with the WordPress code and works entirely on the built-in API. However, I noticed one flaw in the plugin, we can perfectly create custom fields for individual post types, but there is no way to create custom fields for taxonmy in custom types or categories in posts. This flaw is expected to be fixed in the near future., but for now I decided to offer a plugin for my readers Ultimate Taxonomy Manager which could be a great addition..
The plugin helps solve the problem with pinning an image to a rubric. The plugin currently has 3 field types (picture, text field, combo box).
Installing and configuring the Ultimate Taxonomy Manager plugin
- First you need to download the plugin from the WordPress repository “Ultimate Taxonomy Manager“;
- activate the plugin;
- go to the admin panel section "Settings” -> “Taxonomy Manager“;
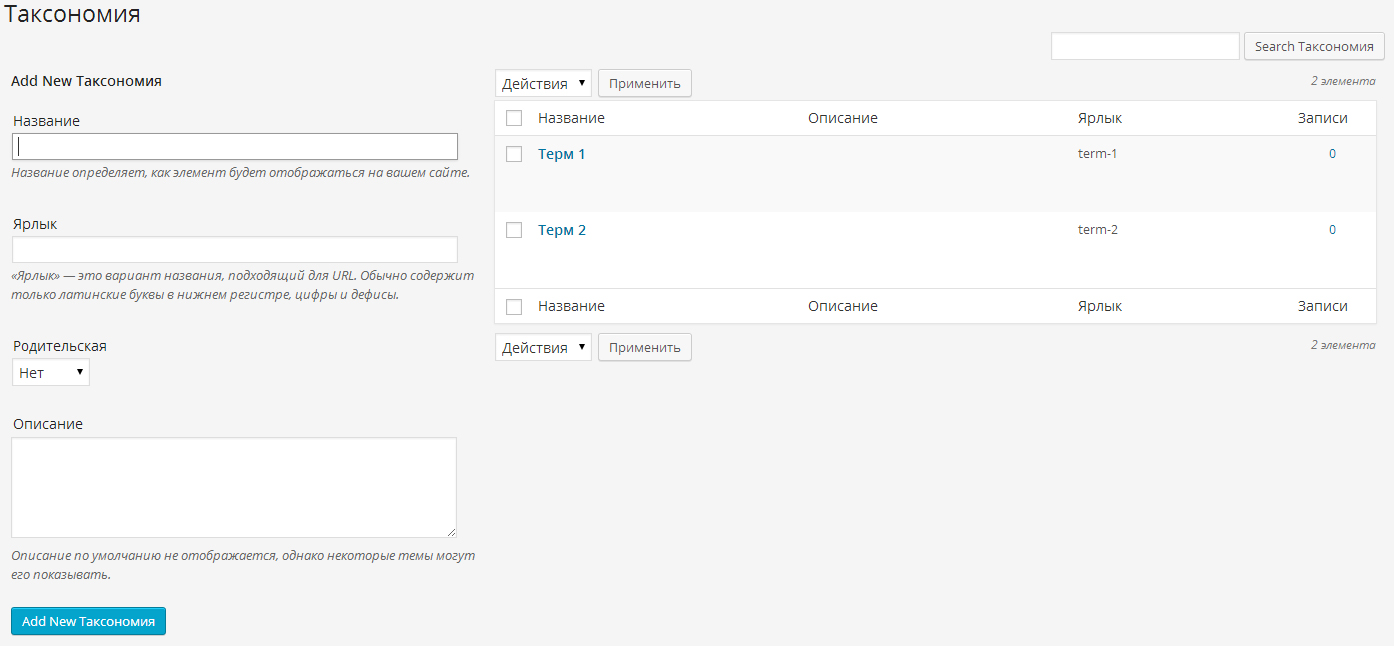
- in the settings tab "Custom Taxonomies” you can add a new taxonomy;
- on the tab "Custom Taxonomy Fields” you can set up additional fields for your taxonomy;
Setting up a new taxonomy
If you have gone to plugin settings “Custom Taxonomies” to tab “Custom Taxonomy Fields“, then you will see the basic taxonomy settings, if you are familiar with the WordPress API, you can open and configure additional options “Additional Options“.

In the next window you can:
- Give the taxonomy a name (must be in English and in small letters, without spaces);
- Select standard data type (pages, records) or arbitrary (created by you), for which you are creating a taxonomy (it could be news categories, streets for ads or deal type);
- Go to more extensive additional settings “Additional Options”.
Additional plugin settings
We won't consider them all., we will focus only on the main.
- Label of Taxonomy – the name of the menu item for the taxonomy;
- Show as ComboBox - exposes 2 the type of metabox in records
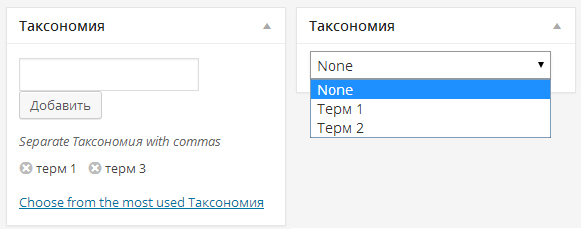
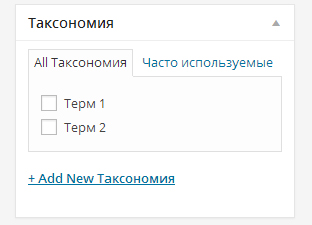
The main difference is, that in the first case, the user has the opportunity not only to choose, but also add terms, and in the second can only choose one of the proposed.
- Slug – when you select a category on the blog, you see the word /category/news/ in the link, for taxonomy, you can insert your servants in the link /{slug}/news/ (write only in English, without spaces and with small).
- Hierarchical - indicates, whether the taxonomy will be hierarchical like categories or non-hierarchical like tags.
Other settings, if interested, see for yourself, but it will already be for more advanced WordPress developers.
After creating the taxonomy
After creating the taxonomy, you will be able to see the result in the left menu and on the post page.

Filling the new taxonomy and custom fields
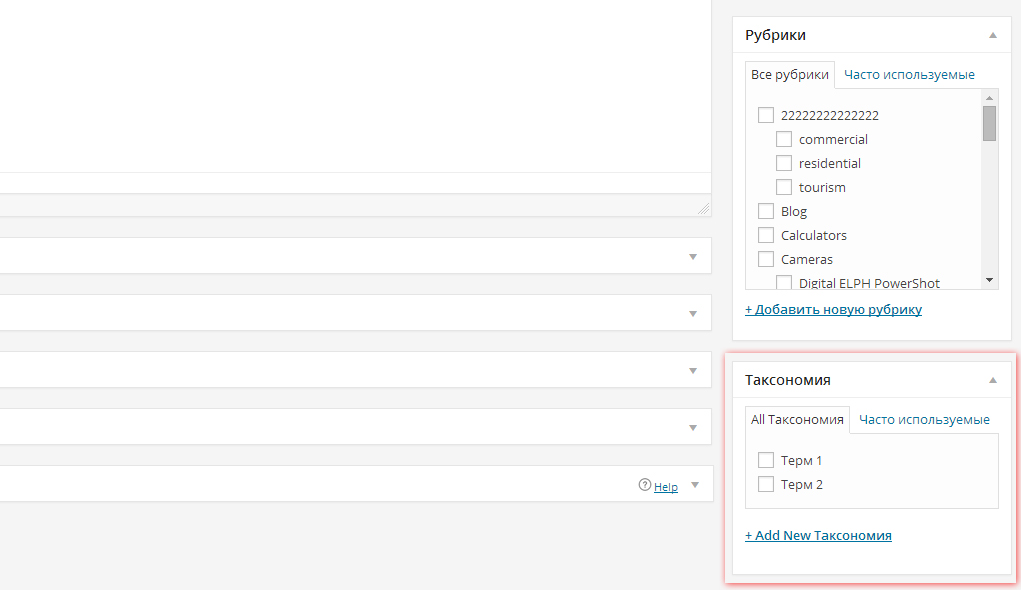
If, after creating a new taxonomy, we go along the “Posts” path -> "Taxonomy", then we will see all the same fields as in the categories.
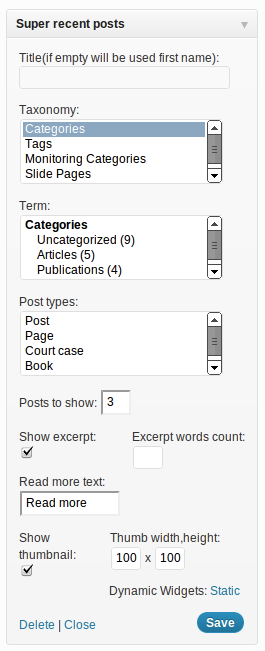
To create additional custom fields, go to the menu “Settings” -> “Taxonomy Manager” and select the tab “Custom Taxonomy Fields“. In the window that appears, select our taxonomy and click the “Manage“.
In the picture below you can see what the fields look like:
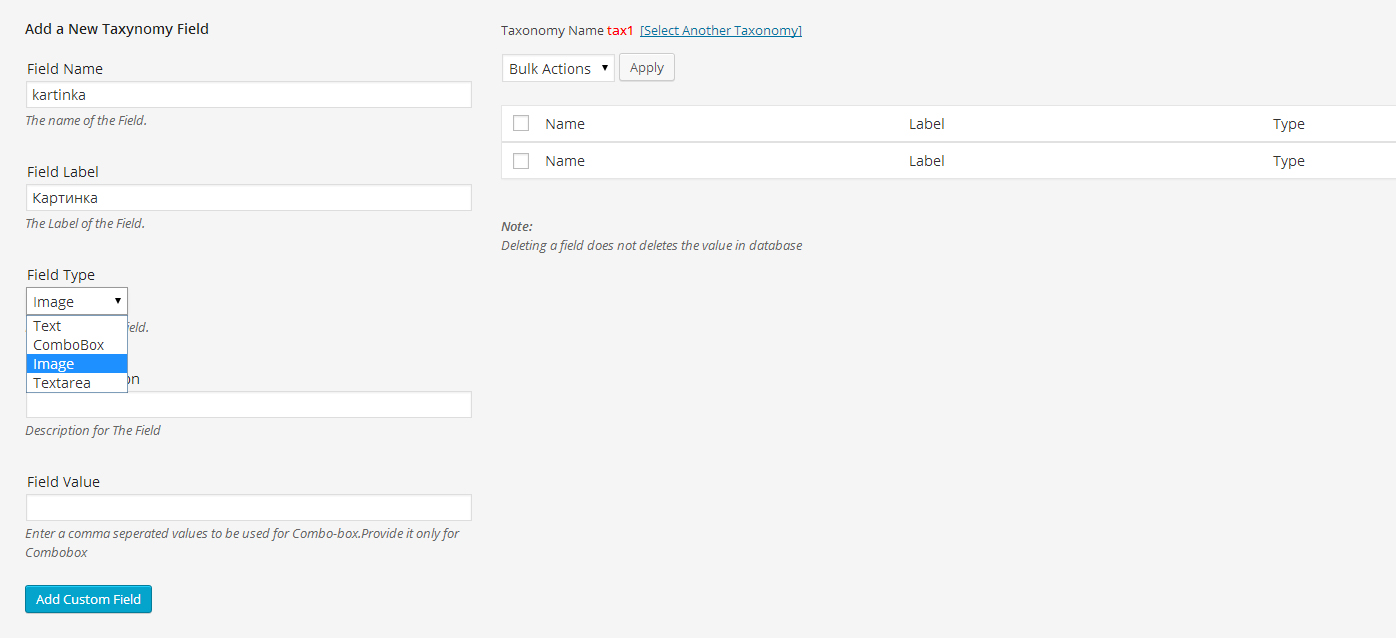
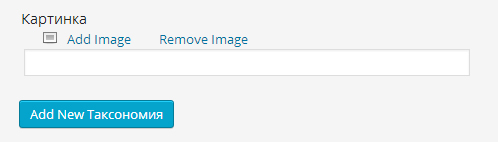
To add a field, you just need to specify the Field Name, Field Label, Field Type. After pressing the button Add Custom Field the name of your custom field will appear on the right in the list. To check the work done, go to the menu “Recording” -> “Taxonomy” and at the very bottom of the list of fields you will see a new field for adding a picture. You can also add fields for standard headings.
This lesson ended, good luck with website development.

/*

- Basic web design course;
- Site layout;
- General course on CMS WordPress and continuation of the course on template development;
- Website development in PHP.